Simple Text Input Screen in Bipsi
Hi all!
I thought I'd write up a quick tutorial on how I implemented in bipsi a simple screen to set up the name of your character.
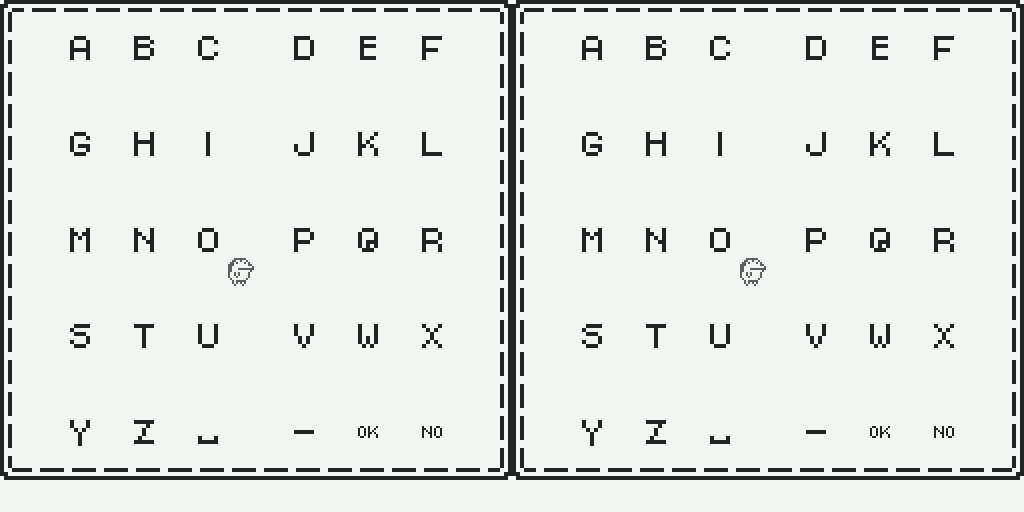
First of all, you need to draw each individual character you want to include in your "keyboard". In my case I used all of the latin characters used in the English alphabet plus hyphen and whitespace.
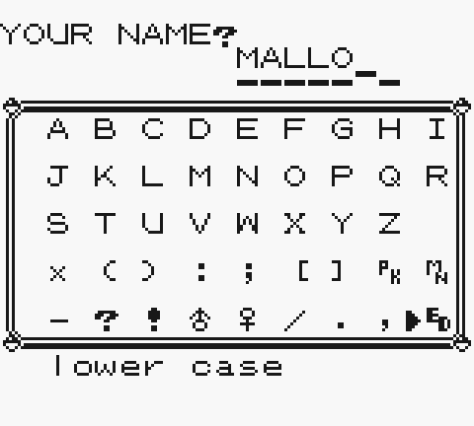
In terms of the layout, I was partially inspired by the Pokémon Gen 1 games. However, for I Gotcha I was conscious of my own limitations and the fact I couldn't have a cursor and then some other kind of input to confirm that is the letter you want to select. So in the end I decided to space out each character as much as possible, as once you "step" on a letter it will be automatically added to the variable that holds the name for the character. We have also set up two more sprites that will be used to validate (OK) and to allow the player to start again in case they mess up (No).
 |  |
Once you have them all drawn as sprites, create a 'character' event for each and place them in the room. Based on the current version of bipsi (release 2022/05/03), each character will contain 4 fields in them (but this could be different in the future).
- graphic / tile: with the sprite for the character it represents
- colors / colors: with the colors applied to your sprite
- say / dialogue: will hold the confirmation message with the current state of the name for the character
- before / javascript: this will hold the javascript code retrieving the current state of the variable and add the letter you just selected.
For the letters, hyphen and whitepace the say / dialogue field consists of:
So far, your name is "[[name]]".
Simple.
The before / javascript field is a simplified variation of the fetch quest example in the bipsi scripting guide. But instead of using a type number variable, using a type string one. Example for the letter A below.
let prev = GET("name", "");
SET("name", prev + "A");
Now, I actually have no idea of JavaScript, but my understanding is that the first line creates a temporary variable "prev" (previous) by retrieving the global variable "name" (for example) using the function GET() which comes with a fallback in case "name" can't be found (as it hasn't been recalled/setup yet). The second line simply appends "A" to the temporary value and sets that as the global one.
Replicate this with every other character.
For the "No" tile, you can have the same setup as the other, but forgo the say / dialogue field.
This is what before / javascript looks like:
let finalname = GET("name", "");
if (finalname == "") {
 SAY("You don't have a name yet!");
} else {
 SET("name", "");
 SAY("Your name's been reset. Please re-enter your name.");
}
What this does is check if the global variable holds anything in there:
- If it doesn't, the game tells you you didn't have anything there in the first place.
- If it does, the game deletes whatever was in there.
For the OK event, set it up as above with graphic / tile , colors / colors. Then create two javascript ones, before and after.
Just as above, before here will check if the player hasn't inputted anything in the field and if that's the case it wont let them proceed.
let finalname = GET("name", "");
if (finalname == "") {
 SAY("You don't have a name yet! Please enter your name first.");
}
For after, we confirm the variable to the player one last time and then we start the game proper in whatever method we prefer.
let finalname = GET("name", "");
if (finalname != "") {
await SAY("Your name is [[name]].");
let gamestart = FIND_EVENT("game-start");
await TOUCH(gamestart);
}
In this case, I set up an exit event out of reach for the player and triggered it from here.
And that's it! Hope you make use of it in your future bipsing!
I Gotcha
A story about the impostor in all of us
| Status | Released |
| Author | PRINCESS INTERNET CAFé |
| Genre | Interactive Fiction |
| Tags | 1-bit, bipsi, Black and White, Gay, LGBT, Pixel Art, Retro, sad, tamagotchi, Top-Down |
| Languages | English |
| Accessibility | Color-blind friendly, High-contrast |

Leave a comment
Log in with itch.io to leave a comment.